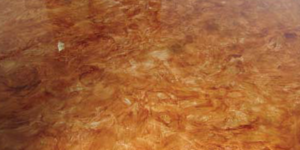

Role Mottles – Mottled Look
Submitted by Rachel Bruce, FLOORmap Stencil Designs, Springdale, Ark.
www.floormapdesigns.com
A few colors of dye, some common butcher paper and a little creativity are all it takes to get this handsome mottled finish.
Ingredients:
- AmeriPolish Solvent-Based Dye: Caramel, Saddle Brown and Walnut
- Heavy butcher paper or masking paper, at least 24 inches wide
- Special equipment: Preval sprayer or another aerosol sprayer
Directions:
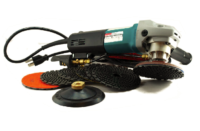
- After placing your concrete, grind the surface to the point where you’re using 400-grit abrasives.
- Once you’ve finished a pass with the 400-grit pads, clean the surface thoroughly to remove all dust and debris. Let the floor dry completely.
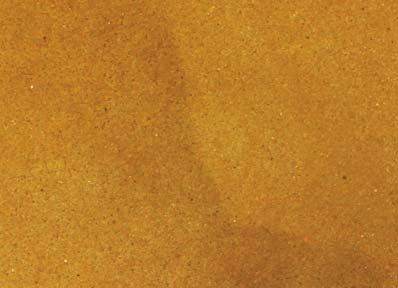
- Mix a batch of AmeriPolish dye that’s equal parts Caramel and Saddle Brown. Apply an even coat to the entire surface area.
- Once that coat has been applied, mix a batch of Saddle Brown and spray it unevenly over the surface to create more depth and texture. Avoid any kind of distinct pattern when applying the darker color.
- Cut several 5-foot lengths of paper (three or four pieces). Tear off one 5-foot edge of each piece so you have a 5-foot-long ragged edge. Make sure your torn edge has plenty of “hills ” and “valleys ” for a more dramatic visual effect.
- Mix a batch of dye that’s equal parts Saddle Brown and Walnut.
- Place your paper panels at random and fill an aerosol sprayer with the Saddle Brown and Walnut dye mixture.
- Position the sprayer above the paper and spray out towards the torn edge. Spray at an acute angle (close to 0 degrees), letting the dye settle out over the concrete surface. This approach will give your colors a nice, natural-looking gradient.
- Pick up the paper panels, rearrange them, and repeat the dye process. Make sure you vary the angles and positions of the paper often to ensure a random, nonrepetitive pattern.
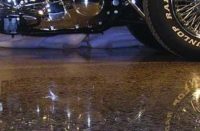
- Once you’ve achieved the desired pattern, let the surface dry thoroughly.
- Clean any dye residue from the surface before continuing with the polishing process, stepping up your abrasives until you reach the desired level of gloss.