
Recipe submitted by: Surfacing Solutions Inc., Temecula, Calif. | www.surfacingsolutionsinc.com
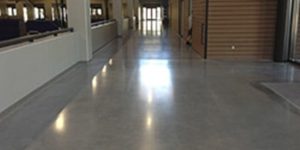
This is an expert self-leveling application that can take an unfinished floor with two different substrates (in this case concrete and plywood) and turn it into one beautiful, continuous floor.
Ingredients:
- Westcoat WP-47-3 Seam Tape
- Westcoat WP-25 Metal Lath
- United Terrazzo Supply terrazzo divider strips, quarter-inch
- Westcoat WP-81 Cement Modifier
- Westcoat TC-1 Basecoat Cement
- Mapei Ultraplan M20 Plus self-leveling concrete
- United Terrazzo Supply glass aggregate, size co2: clear, mirror, purple and other colors
- Mapei Planibond EBA epoxy bonding agent and primer
- Silica sand, 16 grit to 20 grit
- Westcoat SC-35 water-based stains: Mesa and Mahogany
- Westcoat EC-95 polyurethane topcoat
- Floor polishing wax
- Special equipment required: staple gun with lots and lots of staples, hand-held and large floor grinders with a full range of abrasives
Directions:
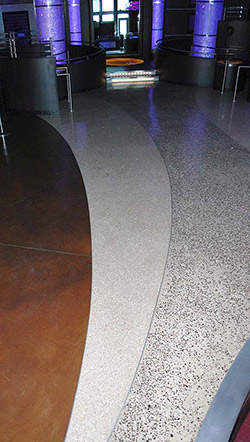 This technique is all about taking a floor with two substrates (in this case, about 65 percent concrete slab and 35 percent plywood subfloor) and uniting them under a single, cohesive finished floor. As you might expect, for a technique like this there is a lot of prep work that has to happen before you put down the topping.
- First, you’re going to want to have a detailed plan of how your design is going to lay out on the floor. This technique uses three different batches of concrete, each with its own color scheme, and you can configure that palette however you like. Just make sure you have your design in hand before you start.
- Start by prepping the plywood subfloor. Apply the seam tape to all of the plywood seams and staple it down to secure it.
- Mark out the borders of the design on the plywood and attach your terrazzo divider strips along those borders. (You’ll do this for the concrete substrate too, but not yet.)
- Staple the lath over the plywood areas between the terrazzo strips. Make sure that any edges of lath overlap by two inches. Also, the lath requires about 10 staples per square foot — don’t be stingy with the staples.
- Now, it’s time for the base coat. Mix a bag of the base-coat cement with a gallon of water and a gallon of the cement modifier. Pour it over the lath and trowel it down until it’s reasonably flat. The goal is to try to cover up all of the lath, but don’t worry if a little bit of it sticks out.
- Let that dry overnight.
- You’re also going to prep the concrete slab, so that all your self-leveling can go down at the same time. The first step is to grind the surface with coarse abrasives to create a profile. You can tell the substrate is ready to go when water no longer beads on the surface.
- Wash the floor free of dust and let dry thoroughly.
- Mark out the rest of your pattern and install dividing strips to mark off the rest of your sections. Now your entire floor is ready for the self-leveling topping.
- Before priming the floor, get your first batch of self-leveling in the mixer with the aggregates, because you’re going to want to place it very quickly after you prime your surface. You’re going to have three batches of self-leveling mix — one with no aggregate, one with lighter-colored aggregate (clear and mirror) and the other with darker, more colorful glass (purple and miscellaneous).
- Mix the first batch of self-leveling concrete with no aggregate, following the directions. You’re going to place this in the sections that will be your dark brown accent sections.
- Prime the floor in those sections by rolling out a coat of epoxy primer and quickly broadcast silica sand onto the surface.
- While the epoxy is still tacky, pour the self-leveling mix into the correct bordered areas and float flat.
- Once you have all of the no-aggregate sections done, mix your next batch of self-leveling, adding the lighter glass aggregates (clear and mirror) at a 1:1 ratio by weight (e.g., 100 pounds of glass for 100 pounds of concrete).
- Prime the sections that you want to be a lighter color with the epoxy, broadcast the silica sand and place the self-leveling concrete. Float them flat.
- Repeat the last two steps one more time with the darker-colored aggregates, and fill in the rest of the floor sections.
- Float the last sections flat, and let the whole floor cure for a minimum of 24 hours.
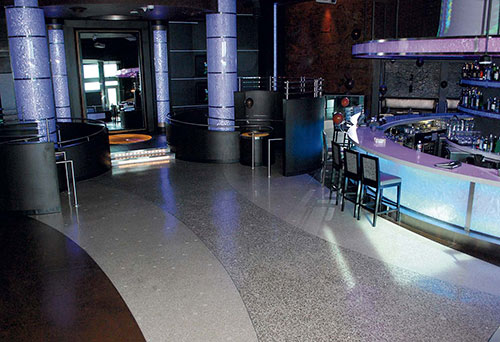
- The next step is to grind down to expose the glass aggregate. Most of this you should be able to do with a standard floor grinder, but for some of the plywood areas the weight of the floor grinders might be too much, in which case you should use the hand-held grinders. Just be aware of whether or not your substrate can support the floor grinders before you begin.
- Start with 40-grit abrasives, and step up incrementally to the finer 200-grit or 400-grit pads.
- When you’re done grinding, clean the entire floor thoroughly, let dry, and then mask off everything but the plain, no-aggregate sections.
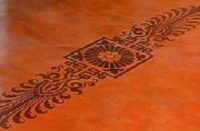
- It’s time to add the brown accent colors. Mix your stains — one batch of Mesa and one of Mahogany — in pump sprayers. Spray one coat of Mesa evenly over each accent section, and then go back and spray a lighter coat of Mahogany over the top.
- When your stains have dried, wash the entire floor thoroughly and let dry.
- Apply two coats of the polyurethane topcoat — each coat takes a full day to dry, so be patient.
- Finally, apply three coats of floor polish wax for an extra bit of shine.